


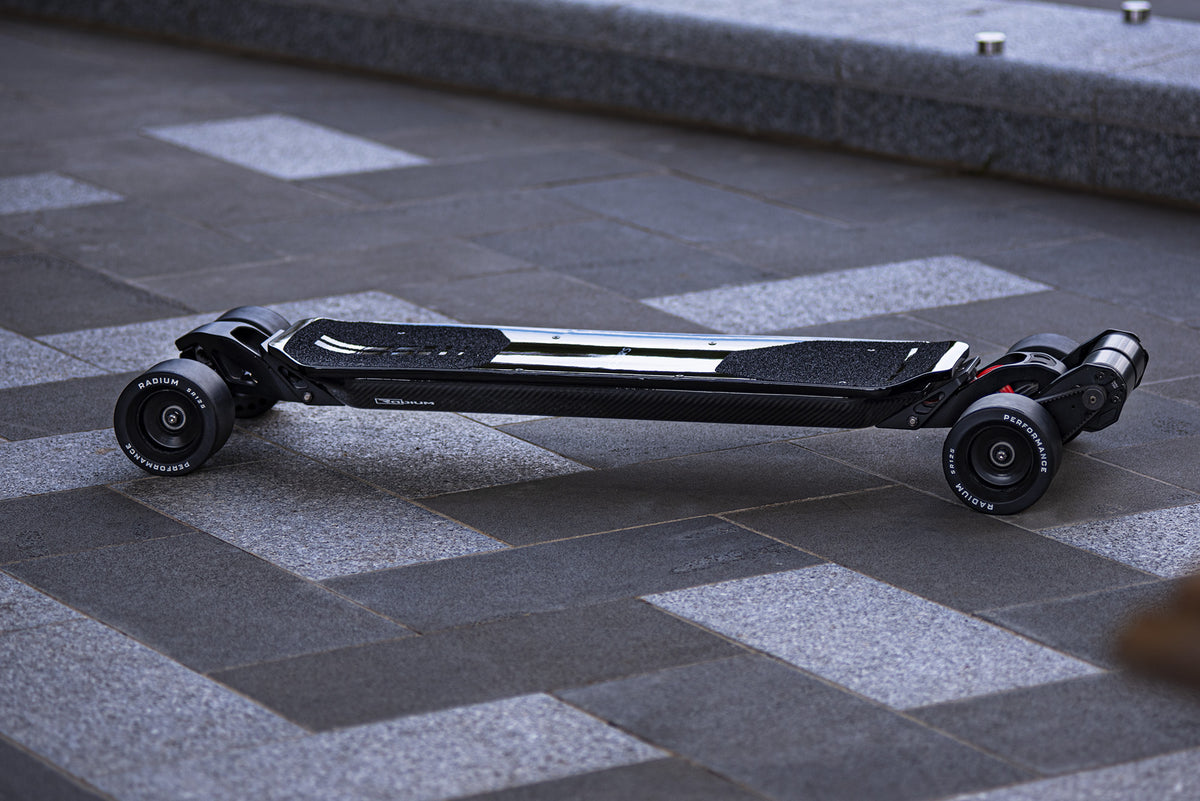
MACH ONE S
Mach One S Support
Everything you need to keep your Mach One S running smoothly. For general support, email contact@radium-performance.com — or check your orders via your Radium Customer Account.
Manuals
- Mach One S — full instruction manual
- Mach One S — remote & control guide — every button, screen and setting on the remote.
Own a Radium board?
- Register your board — new or second-hand — for faster warranty help and direct service notes.
- Battery care & charging guide — the habits that keep a pack healthy for years.
OWNER'S MANUAL
Mach One S – Instruction Manual
Version 1. Please read all safety precautions before use.
Safety Precautions
Please read all safety precautions before use.
- Always wear a helmet and protective gear.
- Do not exceed the weight limit of 120kg
- Ensure the remote and Mach One battery are charged before riding.
- Ride in a safe environment away from heavy traffic.
- Follow local laws and regulations regarding electric skateboard usage.
- Do not ride the board if you are under the age of 14.
- Do not ride if you are under the influence of drugs or alcohol.
- Do not always rely solely on the brakes; control your speed by carving to slow down and always think ahead.
- ALWAYS check that all screws are tight and nothing is loose before riding.
- ALWAYS respect pedestrians.
Battery Safety & Care
- Do not charge unattended.
- Only use the charger provided by Radium for the Mach One S.
- Do not leave the skateboard with an empty battery for more than 2 weeks.
- To store the skateboard, ensure a state of charge between 50–80%. Periodically check (every few months) and top up if needed.
Charging Your Mach One S
Before using your Mach One S, read and follow these instructions carefully.
Step 1 — Use only the charger supplied or approved by Radium Performance. Using an incorrect charger may damage the battery or electrical system.
Step 2 — Before connecting the charger, make sure the charger input voltage selector is set correctly for your country.
240V Countries: Australia, United Kingdom, New Zealand, India, South Africa, Singapore, Malaysia, Ireland, Hong Kong, Nigeria and Zimbabwe.
120V Countries: United States, Canada, Mexico, Japan, Philippines, Taiwan, Cuba and Saudi Arabia.
Step 3 — Connect the charger to the Mach One S charging port, then connect the charger to a suitable power outlet.
Step 4 — The charger indicator will display red while the board is charging. When the battery is fully charged, the indicator will change to green.
Once charging is complete, disconnect the charger from the power outlet and then disconnect it from the board.
Powering Your Mach One S On & Off
Turning On
Step 1 — Make sure the throttle wheel on the remote is centred in the neutral position. Do not apply acceleration or braking while the remote is starting up. If throttle input is detected, the remote will remain disabled until the throttle returns to neutral.
Step 2 — Press and hold the Remote Power Button for 2 seconds. If the board is fully powered down, press and hold the Board Power Button for 2 seconds. The remote and board are paired at the factory and will connect automatically. A short vibration from the remote confirms the connection.
Everyday Power On & Off
After the Mach One S has been turned on and connected:
- Turn the remote off and the board will enter low-power standby.
- Turn the remote back on within 24 hours and the board will wake automatically.
- After 24 hours, the board will fully power down and both the remote and board will need to be turned on again.
Checking Acceleration & Braking
Step 3 — Before riding, lift the driven wheels slightly off the ground. Slowly move the throttle wheel:
- Forward to accelerate
- Backward to brake
The further the throttle wheel is moved, the stronger the acceleration or braking force.
Always check that acceleration and braking are working correctly before riding.
Starting to Ride
Step 4 — Place both feet securely on the board. Slowly roll the throttle wheel forward to begin moving. As you accelerate, gently shift your weight toward your front foot to maintain balance and control.
New riders should begin in L Mode before progressing to the higher-performance modes.
Braking
Step 5 — Slowly roll the throttle wheel backward to apply the brakes. As braking force increases, gently shift your weight toward your rear foot to stay balanced and in control.
Avoid applying full braking suddenly unless required.
Reverse
Direction Control
To switch between forward and reverse direction:
- Make sure the board is travelling below 3 km/h
- Make sure the throttle wheel is in neutral
- Double-press the Function Button
The remote will vibrate and the direction indicator will update. Double-press the Function Button again to return to forward.
Smart Reverse
With the board completely stopped, hold the throttle wheel in the full brake position. The Mach One S will begin moving slowly backward at a limited speed. Ease the throttle wheel back toward neutral to stop reversing.
Routine Maintenance Checklist
| Inspection Area | What to Check |
|---|---|
| Motor Mounts | Check that all motor mount bolts are tight and there is no unwanted movement or shifting. |
| Wheel Bearings | Spin each wheel and check for clicking, grinding or roughness. Replace bearings if worn or noisy. |
| Belts & Motor Screws | Check belt tension. The belt should have a small amount of flex when pinched. Make sure all motor screws are secure. |
| Pulley Grub Screws | Check that all pulley grub screws are tight and that the pulley can’t move on the shaft. |
| Deck & Enclosure Bolts | Inspect all deck and enclosure hardware and tighten where required. |
| Wheel Pulley Bolts | Check for looseness and tighten all bolts evenly. |
| Battery Status | Check the board battery level on the remote before riding. Use the remote ride-data screen to view battery voltage and current if required. |
Before Every Ride
Quickly check for:
- Loose hardware
- Worn or damaged belts
- Excessive wheel movement
- Wheel or tyre damage
- Damage to the deck or enclosure
- Unusual drivetrain noises
- Sufficient board and remote battery charge
Do not ride the Mach One S if any component is loose, damaged or operating abnormally. Inspect and repair the issue before riding.
Compatibility & Configurations
Belt Sizes
| Pulleys | Belts |
|---|---|
| 45T / 16T | HTD5M-375-15, HTD5M-380-15, HTD5M-385-15 |
| 45T / 18T | HTD5M-380-15, HTD5M-385-15 |
Supported Wheel Sizes
The Mach One S supports a range of wheel sizes depending on the pulley, belt and hardware configuration used.
Generally wheels of 80-165mm diameter work without issue. Always confirm wheel and drivetrain compatibility before attempting to fit new parts.
Standard SR125 V3 Setup
| Spec | Value |
|---|---|
| Wheels | Radium SR125 V3 |
| Wheel Size | 125 × 75 mm |
| Core | 6061-T6 Aluminium, Kegel Pattern |
| Core Pin Holes | 5.6 mm |
| Inner Bearing Seat | 22 mm |
| Outer Bearing Seat | 28 mm |
| Bearing Spacing | 10 mm |
| Axle Size | 10 mm |
| Bearing Retention | O-Ring System |
The SR125 V3 uses a hybrid bearing setup, with a 28 mm outer bearing and 22 mm inner bearing while maintaining Kegel compatibility.
Kegel Wheel Compatibility
The Mach One S is compatible with supported Kegel-core wheels.
For the SR125 V3:
- Kegel Pattern Core
- Pin Hole Size: 5.6 mm
- Metal Pulley Pin Size: 5.5 mm maximum
Changing wheel diameter, pulley size or motor pulley size can affect:
- Top speed
- Torque
- Braking
- Belt length
- Ground clearance
Always check fitment and belt tension before riding.
Tuning Trucks & Suspension Bushings
Truck Bushings
| Element | Recommendation |
|---|---|
| Cone Orientation | Ensure cone shaped bushings are installed in the correct orientation, with the larger side facing the truck hangar, and the smaller side facing to the road and truck baseplate. |
| Lubrication | Apply a light layer of grease to the kingpin and pivot tube for smooth articulation and less squeak. |
| Bushing Wear | Inspect occasionally for cracks, flattening, or loss of rebound. Replace when degraded. |
| Pre-load Setting | Adjust the kingpin nut so the bushing compresses slightly — too tight = stiff/unstable, too loose = wobbly feel. |
| Choosing Bushings | Softer bushings allow easier turning; harder bushings provide more high-speed stability and rebound. Adjust to your style and weight. |
Suspension Bushings
| Element | Recommendation |
|---|---|
| Parts Orientation | Double-check correct placement of bushings, washers, and spacers. |
| Lubrication | Grease bushing contact points and pivot interfaces for longevity and quiet operation. |
| Pre-load Adjustment | Increase or decrease tension to change board handling behavior and bump compliance. |
Warranty
The Mach One S Electric Skateboard comes with a 12-month limited warranty covering defects in materials and workmanship from the date of delivery.
What’s Covered
- Manufacturing defects in the deck, trucks, motors, mounts, battery, ESC and other electronic components.
- Structural issues with the enclosure or mounting hardware under normal riding conditions.
- Defective parts or components that fail due to workmanship or material faults.
What’s Not Covered
- Normal wear and tear, including grip tape, bearings, wheels, belts and bushings.
- Damage caused by water exposure, impacts, crashes or accidents.
- Damage caused by misuse, incorrect setup or lack of maintenance.
- Damage caused by modifications or incompatible third-party components.
- Normal battery degradation and capacity loss over time.
Warranty Claims
- Contact Radium Performance with your order details and a description of the issue.
- Provide photos or videos if requested.
- We will first attempt to diagnose and resolve the issue remotely where possible.
- If the claim is approved, Radium Performance may repair or replace the defective component at its discretion.
Shipping — Shipping to and from service centres is the customer’s responsibility unless otherwise agreed.
This warranty is non-transferable and applies only to the original purchaser.
It does not cover incidental or consequential damages.
For warranty questions or to start a claim, contact Radium Performance directly at contact@radium-performance.com.